Free TV 3D Models for Modern Living Room Renders
 Sulochana Datta
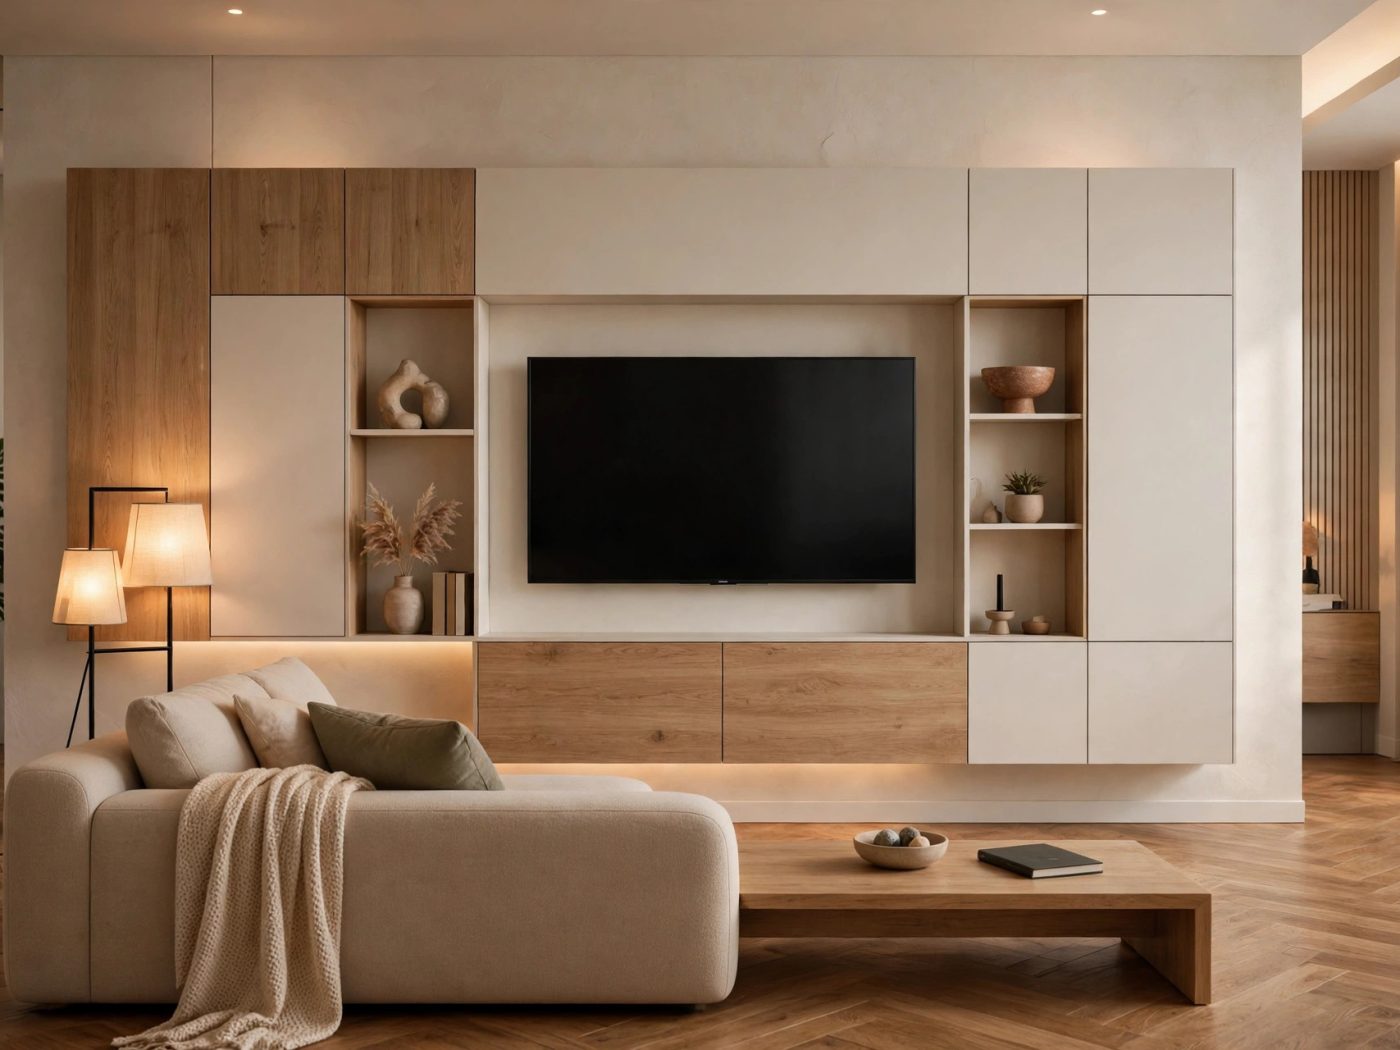
Few objects define a living room render as clearly as the television. A high-quality tv 3d model placed on a media wall instantly tells the viewer what kind of space they are looking at, sets the scale for every other piece of furniture, and gives the scene its visual center of gravity. Whether you are an interior designer presenting a concept, an architect selling a visualization, or a 3D artist building a portfolio piece, the right tv 3d model can make the difference between a render that feels designed and one that feels empty. The good news is that you do not need to model a television from scratch or pay for an expensive asset. Free tv 3d models with clean geometry, accurate proportions, and realistic materials are available, and this guide shows you how to pick one, place it, light it, and build a convincing modern living room around it.
Why a TV 3D Model Is the Anchor of a Modern Living Room Render
In contemporary interior design, the living room is almost always arranged around the screen. Seating faces it, lighting is planned to avoid glare on it, and the media wall behind it is usually the most designed surface in the room. Your render should reflect that hierarchy. When a viewer opens your image, their eye goes straight to the television, and from there it measures everything else: the sofa looks too small or just right depending on the screen, the media console looks proportional or undersized, and the wall treatment reads as intentional or accidental.
Using a dedicated tv 3d model instead of a crude box with a dark material matters more than most artists expect. A real television has a thin bezel, a specific screen aspect ratio, a stand or wall-mount bracket with visible depth, ports and vents on the back, and a subtle curve or flat panel that catches reflections. Viewers may not consciously register each of these details, but their absence makes a render feel off. A properly built model carries all of this in a few thousand polygons, so it costs you almost nothing in render time while adding a great deal of credibility.
There is also a practical argument. Television sizes are standardized, which makes a tv 3d model one of the few assets you can use as a reliable scale reference. A 55-inch screen has a fixed diagonal, so if your model is dimensionally accurate, you can check the sofa width, the console height, and the viewing distance against it and know immediately whether the room feels real. Professional visualizers use the TV as a yardstick in exactly this way, and clients notice when proportions are right even if they cannot name why.
How to Choose a TV 3D Model for Your Scene
Not every free tv 3d model is worth downloading. Before you commit an asset to a project, run through these checks so the model supports your render instead of undermining it.
Check the proportions against real screen sizes
A convincing tv 3d model follows the 16:9 aspect ratio of real flat panels. Screen sizes are sold by diagonal measurement, and the width and height follow from that: a 55-inch TV measures about 48.5 inches wide and 27.3 inches tall, a 65-inch is roughly 57 by 32 inches, and a 75-inch is around 66 by 37 inches. When you import the model, compare its dimensions to one of these standards. If the screen is noticeably squarer or wider than 16:9, the asset was modeled by eye rather than by specification, and it will subtly distort your scene. Dimensionally accurate models also let you state a realistic screen size in your client presentation, which designers appreciate.
Wall-mounted or console-standing
Modern living rooms usually mount the TV on the wall or rest it on a low media console, and your tv 3d model should match the setup you are rendering. Wall-mounted setups need a model with a believable rear profile, a bracket or flush-mount plate, and a small gap from the wall. Console setups need proper feet or a center stand with realistic contact shadows. Some free models include both configurations as separate objects or groups, which is ideal because it lets you switch presentation styles without rebuilding the scene. If the model only has a stand but you want it wall-mounted, you can delete the stand and sink the panel slightly into a wall recess, but a model that ships with a bracket will always look cleaner.
Inspect the geometry and topology
Open the wireframe and look at the screen edge, the bezel, and the back panel. A good tv 3d model keeps the front surface clean and flat, with the bezel as a thin frame and the electronics bulge on the back handled with simple, well-placed edges. Watch out for models with messy topology around the screen corners, because those areas catch highlights and will show shading artifacts in close-ups. Also check the polygon count: a TV does not need hundreds of thousands of polygons. Anything under fifty thousand is comfortable for most scenes, and many excellent free models sit well under twenty thousand while still reading perfectly at typical render distances.
Look for usable materials, not just a dark screen
The default materials that come with a free model matter. At minimum, you want a screen material with a very dark, slightly reflective surface, a bezel material in matte black or dark gray, and a metal or plastic finish for the stand. The best models separate these into distinct material slots so you can tune each one. If the whole model arrives as a single material, you can still split it, but it costs you time. Also confirm the UVs are sane: the screen should map cleanly so you can apply an image or an emissive texture without stretching, which is useful when you want the TV on, showing a scene, in an evening render.
Building the Media Wall Around Your TV 3D Model
The television rarely floats alone. In a modern living room render, it sits inside a composed media wall, and the furniture around it is what sells the design. Start with the wall itself. A full-height panel in oak, walnut, or a warm neutral plaster gives the screen something to sit against and immediately reads as designed. Many visualizers add a recessed niche exactly the size of the TV so the panel sits flush, which hides the bracket and gives the composition a built-in look. Slatted wood panels on one or both sides of the screen are another reliable move: they add rhythm and texture without competing with the television.
Below the screen, a low media console grounds the composition. Keep it long and low, roughly one and a half to two times the width of the screen, and leave a comfortable gap between the bottom of the TV and the console top. This gap is where a lot of renders go wrong: push the TV too close to the console and the setup looks cramped; float it too high and the room feels disconnected. A distance of six to ten inches between the console surface and the screen’s lower edge reads naturally for most seating arrangements.
Pair the TV with seating that matches its scale. A large screen calls for a generous sofa placed at a realistic viewing distance, which is roughly one and a half to two and a half times the screen diagonal. For a modern flat screen TV 3D model in the 55 to 65-inch range, that means the main sofa sits about eight to twelve feet away. Placing a corner sectional sofa across from the media wall fills the frame, balances the composition, and gives the render the lived-in feeling clients respond to. Layer in a coffee table, a rug that anchors the seating zone, and a floor lamp or two to round out the scene. An arc floor lamp works particularly well because it brings warm light into the seating area without competing with the screen, and a touch of greenery such as an HD houseplant softens the technology-heavy corner of the room.
Styling the shelves and surfaces
Open shelving around the TV is where your render gains personality. Style it the way a set designer would: a few books, a small sculpture, a vase with dried stems, and one plant. Keep the objects asymmetric and leave breathing room between them. Overfilled shelves read as clutter in a render even when they look fine in real life, because the camera flattens everything. Limit each shelf to three or four items, vary their heights, and let the television remain the clear focal point.
Lighting and Material Tips for a Realistic TV 3D Model
Lighting makes or breaks a television in a render, because a screen is simultaneously a dark reflective surface and, when switched on, a light source. Get these two states right and the rest of the room follows.
The TV-off daytime look
Most portfolio renders show the TV switched off in a bright room, which means the screen behaves like a dark mirror. Give the screen material a low roughness with a dark base color and let it reflect the room: windows, the sofa, the rug. These reflections are what make the screen feel like glass instead of a black rectangle. Position your key light so the screen picks up a soft, believable reflection rather than a blown-out hotspot. If your renderer supports it, a subtle clearcoat or reflection layer on the screen sells the glass cover that real panels have. Keep the bezel matte so it frames the reflection without competing with it.
The TV-on evening look
Evening renders with the screen on are dramatic and popular with clients, but they need care. Apply an emissive material to the screen with an image of a softly blurred scene, a landscape, or abstract artwork rather than a sharp broadcast frame, which can look dated and can raise content concerns in commercial work. Keep the emission strength moderate: the screen should glow, not burn out the exposure. Add a faint blue-white area light in front of the screen to simulate the light it throws onto the sofa and rug, and consider a subtle bias light behind the TV, a warm strip that separates the panel from the wall and kills the harsh contrast. This is the single most effective trick for evening TV renders, and it mirrors what home theater enthusiasts actually install.
Cables, ports, and the details nobody notices until they are missing
For wall-mounted setups, run a cable channel or a single slim cable from the bottom of the TV down behind the console. It takes two minutes to model and eliminates the floating-screen effect that sharp-eyed clients always catch. If your tv 3d model includes a back panel with vents and ports, leave it as is; if it is a flat slab, add a simple dark box on the rear to suggest the electronics housing. These details never get compliments, but their absence gets criticism, so treat them as mandatory.
Scale and Placement: Sizing Your TV 3D Model Like a Pro
Choosing the right screen size for the room is a design decision, and getting it wrong is one of the fastest ways to make a render feel amateur. Use these guidelines:
- Compact living rooms (up to about 150 square feet): a 43 to 50-inch tv 3d model keeps the proportions believable and leaves wall space for shelving.
- Standard living rooms (150 to 250 square feet): the 55 to 65-inch range is the sweet spot and the most common choice in real interiors.
- Open-plan great rooms: 65 to 75 inches and above, with a media wall wide enough to balance the screen.
- Media and theater rooms: 75 inches and up, or a projector setup, with seating arranged in rows or a deep sectional.
Mount the center of the screen at seated eye level, roughly 42 inches from the floor. This is the ergonomic standard designers use, and matching it makes your render feel correct to anyone who has ever arranged a living room. Double-check the viewing distance as well: if the sofa is fifteen feet from a 50-inch screen, the composition will feel disconnected no matter how nicely everything else is styled.
Common Mistakes to Avoid
- Wrong aspect ratio: stretching a 16:9 screen to fill a wall niche distorts the image content and looks immediately fake. Size the niche to the screen, not the other way around.
- Glare bombs: placing a bright window directly opposite the screen creates a blown-out reflection. Angle the TV or the window light so the reflection stays soft.
- Floating panels: a wall-mounted tv 3d model with no visible bracket, shadow gap, or cable reads as pasted on. Add the mount and the contact shadow.
- Ignoring the back: open-plan renders sometimes show the back of the TV from the dining area. Make sure the rear of the model is finished, not hollow.
- Oversized screens: bigger is not always better. A screen that dominates the wall makes the room feel smaller and the design feel insecure.
- Forgetting the remote: a small remote on the coffee table is a two-minute addition that adds a surprising amount of lived-in realism.
Frequently Asked Questions
Where can I download a free tv 3d model for my renders?
Marketplaces like 3dsky.net host free tv 3d model assets with clean geometry and realistic materials that you can drop straight into interior scenes. Look for models that list real-world dimensions and include separate material slots for the screen, bezel, and stand so you can customize the finish to match your design.
What file formats should a tv 3d model come in?
For 3ds Max users, the native MAX format is the most convenient, while FBX and OBJ work across Blender, Cinema 4D, SketchUp, and Unreal Engine. If you plan to use the model in a real-time engine, check that the polygon count is reasonable and that the materials convert cleanly.
How big should the TV be relative to the sofa?
As a rule of thumb, the screen width should be roughly half to two-thirds the width of the main sofa, and the viewing distance should be about one and a half to two and a half times the screen diagonal. These ratios keep the composition balanced and the room believable.
Should I render the TV on or off?
Both work, but they serve different purposes. TV-off daytime renders show the room at its brightest and are the safest choice for design presentations. TV-on evening renders are moodier and more dramatic, and they photograph well for portfolios, but they demand careful exposure control so the screen does not blow out.
Can I use a free tv 3d model in commercial client work?
Most free models on reputable marketplaces permit commercial use, but licenses vary, so always check the specific license attached to the model you download. When in doubt, choose assets marked free for commercial use and keep a record of the source.
How do I avoid reflections looking fake on the screen?
Use a real environment for the screen to reflect rather than a flat studio HDRI, keep the reflection slightly blurred with a low roughness value, and make sure the reflected content matches the room: the screen should mirror the sofa and windows that actually exist in your scene.
Conclusion
A great living room render is built around its television, and a great television in a render starts with a solid tv 3d model. Choose an asset with accurate 16:9 proportions and clean topology, match the screen size to the room, build a composed media wall with a low console and balanced shelving, and light the screen like the dark mirror it is, or the soft light source it becomes in the evening. Get those fundamentals right and the rest of the scene, the sofa, the lighting, the styling, falls into place around it. Download a free tv 3d model, drop it into your next interior project, and watch how quickly the whole room starts to feel designed.